Key Steps and Considerations for Successful Attic Insulation Projects
Attic insulation is a crucial component of home energy efficiency, helping to maintain comfortable indoor temperatures year-round while reducing heating and cooling costs. Proper insulation not only enhances comfort but also minimizes energy waste, prevents heat loss, and boosts your home’s overall value. Let’s explore the key steps, materials, and expert tips to make your attic insulation project truly effective.

Improving your home’s thermal performance starts from the top down, making attic insulation one of the most impactful upgrades for energy efficiency and comfort. A well-insulated attic creates a barrier against heat transfer, keeping your home warmer in winter and cooler in summer while potentially lowering utility bills. The process involves careful planning, material selection, and proper installation techniques to achieve lasting benefits.
Understanding the Importance of Attic Insulation
Attic insulation serves as your home’s primary defense against energy loss through the roof. During winter months, heated air naturally rises and can escape through an under-insulated attic, forcing heating systems to work harder and consume more energy. In summer, inadequate insulation allows heat to penetrate into living spaces, increasing cooling demands. Studies indicate that proper attic insulation can reduce heating and cooling costs by 10 to 50 percent, depending on climate and existing conditions. Beyond energy savings, quality insulation helps prevent ice dams in cold climates, reduces moisture problems, and contributes to more consistent indoor temperatures throughout your home. The thermal resistance of insulation is measured in R-values, with higher numbers indicating greater insulating power. Climate zones across the United States have recommended R-value ranges, typically between R-30 and R-60 for attics, with colder regions requiring higher values.
Assessing Your Current Insulation Needs
Before beginning any insulation project, conduct a thorough assessment of your attic’s current state. Start by measuring the depth and type of existing insulation if any is present. Many older homes have insufficient insulation by modern standards, often just a few inches of outdated material. Check for gaps, compressed areas, or water damage that compromise insulation performance. Look for signs of air leaks around pipes, vents, chimneys, and electrical fixtures, as these pathways allow conditioned air to escape regardless of insulation thickness. Examine the attic floor for proper ventilation, as adequate airflow prevents moisture accumulation that can damage insulation and structural components. Consider having an energy audit performed by a qualified professional who can use thermal imaging cameras to identify problem areas and provide specific recommendations. Document your findings with measurements and photographs to help determine material quantities and identify areas requiring special attention during installation.
Choosing the Right Insulation Material
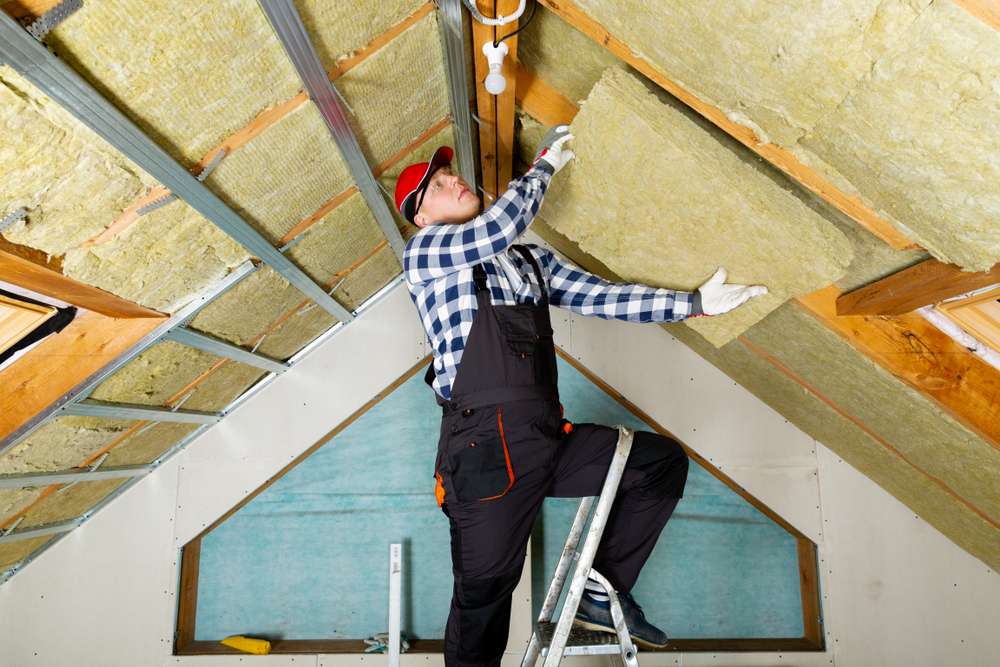
Several insulation materials suit attic applications, each with distinct characteristics, performance levels, and cost considerations. Fiberglass batts remain popular due to affordability and ease of installation, available in pre-cut sections that fit between standard joist spacing. Blown-in cellulose offers excellent coverage around obstacles and irregular spaces, made from recycled paper treated with fire retardants. Spray foam insulation provides superior air sealing and R-value per inch but typically costs more than other options. Mineral wool delivers fire resistance and sound dampening properties alongside thermal performance. When selecting materials, consider factors beyond initial cost, including long-term performance, moisture resistance, fire safety ratings, environmental impact, and compatibility with your attic configuration. Each material type has appropriate R-values per inch of thickness, affecting how much space the insulation will occupy to reach desired thermal resistance levels.
| Material Type | Cost Per Square Foot | R-Value Per Inch | Key Characteristics |
|---|---|---|---|
| Fiberglass Batts | $0.40 - $1.50 | R-2.9 - R-3.8 | Easy DIY installation, widely available |
| Blown-in Cellulose | $1.00 - $2.50 | R-3.2 - R-3.8 | Excellent coverage, eco-friendly |
| Spray Foam | $3.00 - $7.00 | R-3.5 - R-6.5 | Superior air sealing, moisture resistant |
| Mineral Wool | $1.50 - $3.00 | R-3.0 - R-3.3 | Fire resistant, sound dampening |
Prices, rates, or cost estimates mentioned in this article are based on the latest available information but may change over time. Independent research is advised before making financial decisions.
Preparing Your Attic for Insulation
Proper preparation ensures insulation performs effectively and lasts for decades. Begin by sealing air leaks with appropriate materials such as caulk for small gaps and expanding foam for larger openings around pipes and wires. Install baffles or rafter vents along the roof deck perimeter to maintain airflow from soffit vents to ridge vents, preventing insulation from blocking ventilation pathways. Address any moisture issues, roof leaks, or structural problems before adding insulation, as trapped moisture leads to mold growth and material degradation. Clear the attic of stored items and debris to provide unobstructed access to all areas requiring insulation. Ensure adequate lighting for safe working conditions and wear appropriate protective equipment including respirators, gloves, long sleeves, and eye protection when handling insulation materials. Install protective covers over recessed light fixtures rated for insulation contact, or replace non-rated fixtures with insulation-compatible models. Mark the locations of junction boxes and other electrical components to maintain accessibility after insulation installation.
DIY vs Professional Installation
Deciding between do-it-yourself installation and hiring professionals depends on several factors including project scope, attic accessibility, material choice, and personal capabilities. DIY installation of fiberglass batts represents a manageable project for homeowners comfortable working in attics, potentially saving 50 to 70 percent compared to professional installation costs. However, achieving proper coverage without gaps or compression requires attention to detail and physical stamina for working in confined, uncomfortable spaces. Professional installation becomes advantageous for blown-in or spray foam applications requiring specialized equipment and expertise. Experienced contractors complete projects efficiently, ensure proper R-values throughout, and typically provide warranties on materials and workmanship. Professional installation costs vary widely based on location, attic size, material selection, and project complexity, generally ranging from $1,500 to $5,000 for average-sized homes. Consider professional services if your attic has complex configurations, requires extensive air sealing, or if you have physical limitations that make attic work challenging. Regardless of approach, verify that the final installation meets local building codes and achieves recommended R-values for your climate zone.
Maximizing Long-Term Performance
Once installed, attic insulation requires minimal maintenance but benefits from periodic inspection. Check annually for signs of moisture intrusion, pest damage, or settling that reduces effectiveness. Maintain proper attic ventilation to prevent heat and moisture buildup that can compromise insulation performance. Avoid compressing insulation when storing items in the attic, as compressed material loses insulating capacity. If you notice increased energy bills or comfort issues, reassess your insulation to determine if additional material or air sealing improvements are needed. Quality insulation properly installed can last 80 to 100 years for fiberglass, 20 to 30 years for cellulose, and indefinitely for spray foam, making it one of the most cost-effective home improvements available. Regular attention to your attic environment ensures your insulation investment continues delivering energy savings and comfort for decades to come.


